6 step Instructions for silicone rubber mould making *FREE Download PLATINUM Cure 50:50
6 step Instructions for silicone rubber mould making *FREE Download PLATINUM Cure 50:50 is backordered and will ship as soon as it is back in stock.
Couldn't load pickup availability
Delivery and Shipping
Delivery and Shipping
Shipping
Items are usually shipped within 2 business days, some custom made items can take up to 2 weeks
When do you pack and post my order?
We pack and post most days before 11am.
Can I come and collect my order?
Certainly, just give us 24-48hours notice to confirm. You may collect form Clifton Springs (near Geelong), Victoria, you can leave a note when you pay for your order as to when you would like to collect. Pick ups are fine most days if paid for and just collecting. Collections at other times can be left out for you by arrangement.
We are in Ocean Grove / Clifton Springs
Our warehouse is in Ocean Grove and home office in Clifton Springs. We have a small showroom in Clifton Springs (as we look into a new venue). Pick ups are possible and local delivery around the Bellarine Peninsula is possible by arrangement.
Returns
Hey - we know you are terrific, but some of our other buyers don't realise if they have a problem, we will always fix it, but if you are nice to us in your messages, we will fix it feeling happy.
We accept returns if the item is faulty or for personal change of mind.
For faulty or damaged items: We are so sorry your item(s) has been damaged and we would love the opportunity to fix the problem with you. Please send us an email describing the problem, with a photograph of what has happened to sales@renascentcollege.com and we will discuss with you personally the best way to solve your concerns. Please do not send them back to us without communicating with us. Rest assured we are here to assist you and want your entire experience shopping with us to be as happy as relaxing in a warm bath.
For change of mind:
Sometimes you accidentally buy the wrong item or just don't like it. That's OK, we want you to be happy.
To be eligible for a return, your item must be unused and in the same condition that you received it. It must also be in the original packaging. You need to contact us within 30 days of receiving the item(s).
You will need to return the item at your expense and we recommend tracking numbers to ensure it is received. If you would like it replaced with a different item (eg you bought laser paper for an inkjet printer), we can assist with this.
Several types of goods are exempt from being returned.
- Perishable goods such as food, flowers, hand made soaps,
- DVD's or Correspondence Courses cannot be returned (but if there's a problem, we will fix it with you)
Additional non-returnable items:
- Gift cards
- Downloadable software products
- Some health and personal care items
- Any item not in its original condition, damaged or missing parts for reasons not due to our error
- Any item that is returned more than 30 days after delivery
To complete your return:
We require a receipt or proof of purchase, (just telling us you bought it on this website will enable us to locate your sale) and for you to contact us prior to returning the item(s).
Refunds for change of mind:
Once your return is received and inspected, we will send you an email to notify you that we have received your returned item. We will also notify you of the approval or rejection of your refund. The only reason for a refusal would be if the item arrived back in a non saleable manner / used / damaged.
If you are approved, then your refund will be processed, and a credit will automatically be applied to your credit card or original method of payment, within a certain amount of days or we can issue you a store credit if preferred.
Late or missing refunds (if applicable)
If you haven’t received a refund yet, please check your bank account again.
Then contact your credit card company, it may take some time before your refund is officially posted.
Next contact your bank. There is often some processing time before a refund is posted.
If you’ve done all of this and you still have not received your refund yet, please contact us at sales@renascentcollege.com.
Sale items (if applicable)
Only regular priced items may be refunded, unfortunately sale items cannot be refunded.
Gifts
If the item was marked as a gift when purchased and shipped directly to you, you’ll receive a gift credit for the value of your return. Once the returned item is received, a gift certificate will be mailed to you.
If the item wasn’t marked as a gift when purchased, or the gift giver had the order shipped to themselves to give to you later, we will send a refund to the gift giver and advise them of your return.
Sssshhhhh, if you friend gave you something and you just don't like it - hey it happens! Don't worry, we will let you return it and swap it over for something else you like better.
Shipping
To return your product, contact us for the return address (Clifton Springs)
Please ensure you include a note with the reason for return and what you would like to do about it and all your contact details including address, email and phone number. Without this we may not be able to work out who and why and it may slow/halt your return process.
You will be responsible for paying for your own shipping costs for returning your item. Shipping costs are non-refundable. If you receive a refund, the cost of initial shipping will be deducted from your refund.
Depending on where you live, the time it may take for your exchanged product to reach you, may vary.
If you are shipping any item(s), you should consider using a trackable shipping service or purchasing shipping insurance. We cannot guarantee that we will receive your returned item.
Our prices are great, we support fair trade and manufacture locally wherever possible and we have a great team of friendly creative people you can chat to for inspiration and advice.
We are here for you - Bathed in Love !
Description
Description
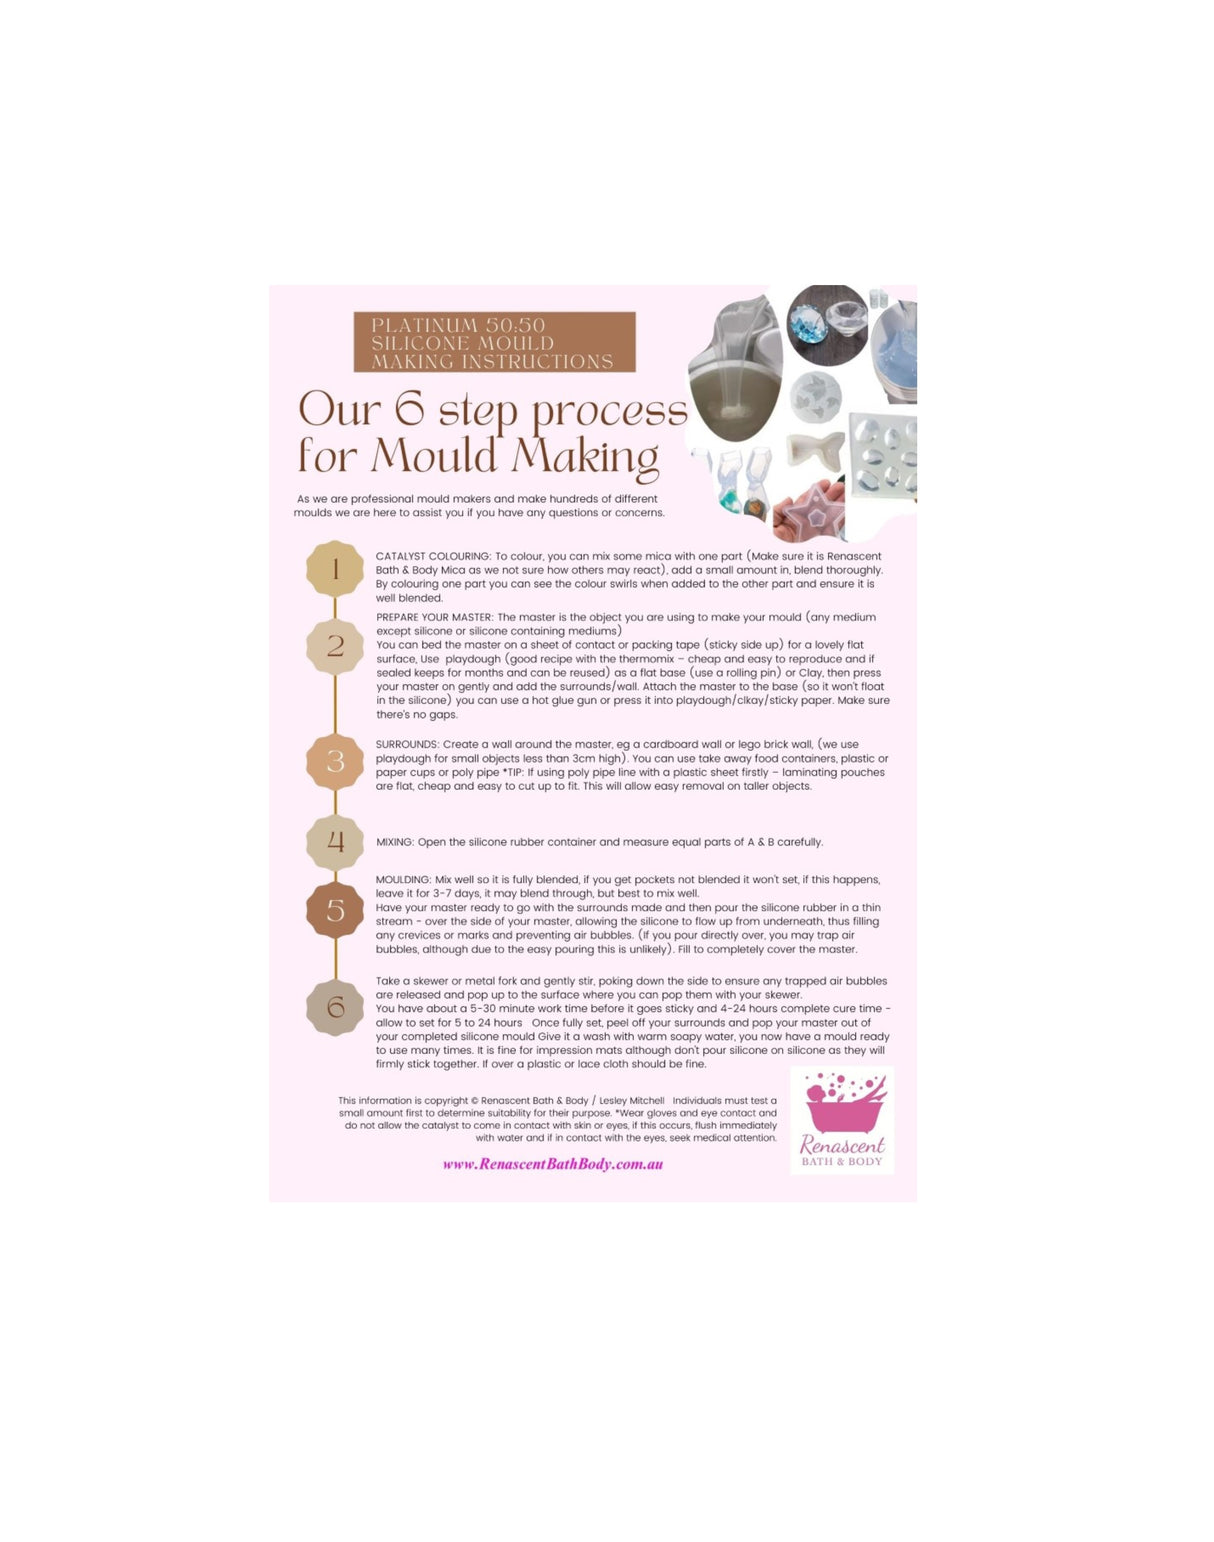
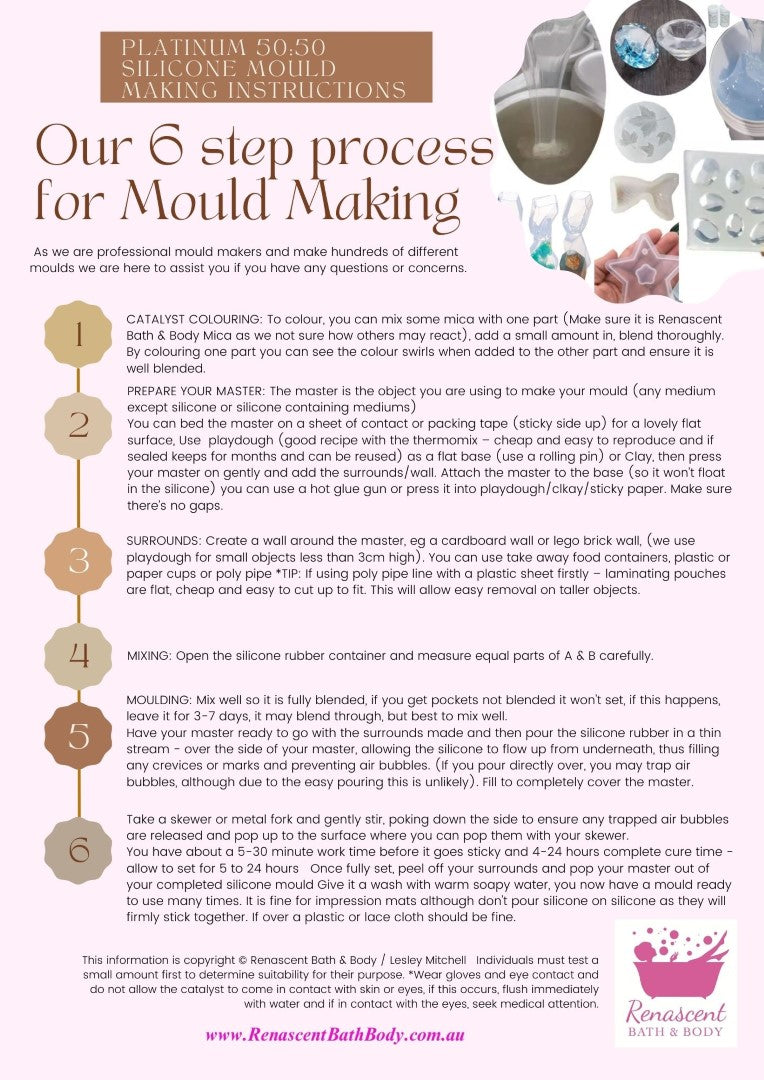
This download is for a FREE printable A4 Instruction Sheet to assist with your mould making. See images for sheet.
BRAND New - perfect pouring PLATINUM Liquid Silicone Rubber 2 part cure
1kg Container Part A, 1kg Container Part B
Pour at a 50:50 ratio
INSTRUCTIONS FOR MOULD MAKING:
CATALYST COLOURING: To colour, you can mix some mica with one part (Make sure it is Renascent Bath & Body Mica as we not sure how others may react), add a small amount in, blend thoroughly. By colouring one part you can see the colour swirls when added to the other part and ensure it is well blended.
PREPARE YOUR MASTER: The master is the object you are using to make your mould (any medium except silicone or silicone containing mediums). You can bed the master on a sheet of contact or packing tape (sticky side up) for a lovely flat surface, Use playdough (good recipe with the thermomix – cheap and easy to reproduce and if sealed keeps for months and can be reused) as a flat base (use a rolling pin) or Clay, then press your master on gently and add the surrounds/wall. Attach the master to the base (so it won’t float in the silicone) you can use a hot glue gun or press it into playdough/clkay/sticky paper. Make sure there’s no gaps.
SURROUNDS: Create a wall around the master, eg a cardboard wall or lego brick wall, (we use playdough for small objects less than 3cm high). You can use take away food containers, plastic or paper cups or poly pipe *TIP: If using poly pipe line with a plastic sheet firstly – laminating pouches are flat, cheap and easy to cut up to fit. This will allow easy removal on taller objects.
MIXING: Open the silicone rubber container and measure equal parts of A & B carefully.
MOULDING: Mix well so it is fully blended, if you get pockets not blended it won't set, if this happens, leave it for 3-7 days, it may blend through, but best to mix well.
Have your master ready to go with the surrounds made and then pour the silicone rubber in a thin stream - over the side of your master, allowing the silicone to flow up from underneath, thus filling any crevices or marks and preventing air bubbles. (If you pour directly over, you may trap air bubbles, although due to the easy pouring this is unlikely). Fill to completely cover the master.
Take a skewer or metal fork and gently stir, poking down the side to ensure any trapped air bubbles are released and pop up to the surface where you can pop them with your skewer.
You have about a 5-30 minute work time before it goes sticky and 4-24 hours complete cure time - allow to set for 5 to 24 hours
Once fully set, peel off your surrounds and pop your master out of your completed silicone mould
Give it a wash with warm soapy water, you now have a mould ready to use many times.
As we are professional mould makers and make hundreds of different moulds we are here to assist you if you have any questions or concerns.
It is fine for impression mats although don't pour silicone on silicone as they will firmly stick together. If over a plastic or lace cloth should be fine.
This information is copyright © Renascent Bath & Body / Lesley Mitchell
Individuals must test a small amount first to determine suitability for their purpose. *Wear gloves and eye contact and do not allow the catalyst to come in contact with skin or eyes, if this occurs, flush immediately with water and if in contact with the eyes, seek medical attention.
Payment & Security
Payment methods
Your payment information is processed securely. We do not store credit card details nor have access to your credit card information.


